Wednesday, 12 April 2017

Hello Blogland

Oh my, I can not believe it has been a year since I last posted on my blog! Wherever has that time gone?
Anyway I am back now with a card I made for some dear friends who recently moved house.
Luckily Darnell of http://www.djkardkreations.com/  is running her NBUS #11 challenge

 
and as I have used some of my Never Before Used Schtuff  on my card I qualify to play along.

I apologize for this photo, I wasn't set up properly for taking a photo and I have had to crop it really close to get rid of  the clutter around it so it looks a little odd (I think). 


 Maybe this looks better?


Mmmm not sure. Anyway......

 My NBUS is
Tim Holtz Window and Windowbox die
Tim Holtz Small Tattered Florals Thinlits dies
Memory box Woodland Branch Die

Other
Brick Embossing Folder
Distress Inks
Various flower and leaf punches for window box
Wooden Planter embellishment
My Minds Eye Ooh La La PP

I enjoyed making this card for our friends Janice and Philip, glad we could help them with the move and enjoyed our evening with them in the pub later. Wishing them all the very best in their new home.

After being MIA for so long I hope I still pop up on a few blog lists, so if you have called in to say hello a big thank you to you for your visit.

Till next time
Happy Art Making
Hugs Lottie x

Thursday, 10 March 2016

NBUS = Bird Crazy Birthday Card

Hello Blog Friends, 
Just popping in to share this Birthday card I made for Jim's birthday I thought I would enter it into Darnell's NBUS challenge #6 here at djkardkreations .


NBUS is a anachronism that stands for .......
Never Before Used Schtuff  and that is mostly what I used for Jim's card.


This happy little chappie is of course one of Mr Tim Holtz crazy birds, I got him into the party mood by dressing him up in a party hat and matching tie (crazy bird not Jim!) 
I coloured him with Distress markers gave him some odd googly eyes and popped him up on a boingy spring for fun  (Jim not crazy bird)!!! 
Boy do those Distress markers do what they say on the tin, after spilling his party drink down his front whilst doing the Hokey Kokey dance he was well and truly blended!
Least said soonest mended I think! 

Soooo my Never Before Used Stuff are
Tim Holtz Crazy Bird and Crazy Things Stamps
Tim Holtz Happy Holiday Thinlits Die
Hobbycraft, musical notes stamp 
Other
Basic Grey Sweet Threads paper pad
Tim Holtz Distress core'dination card
Tim Holtz ShadowPress Sentiments set
Tim Holtz Distress markers and inks
Action Wobble spring

I would just like to Congratulate Darnell on NBUS challenge  #6 and it's hugely successful response.
Thanks for your visit today hope you have a great weekend
Happy Art Making
Hugs Lottie x


Friday, 5 February 2016

Crafty Cardmakers Challenge -156


Hello Blog friends, 
After visiting Angela's blog  here  aka Felix the Crafty Cat last week and seeing her post for the Crafty Cardmakers Challenge  #156. I decided to make this card to play along.
The theme is Punches and/or Dies


I have used both die's and punches to create a card which is feminine and reminds me a little of the  Victorian style of cards.
My elements are
Tim Holtz :-     Caged Bird die
Marianne Designs :-    Swirl Leaf
Sizzix :-    Butterfly #12
Stampin Up:-     Bird builder punch  (leaves)
Crafty Individuals :-    Springtime background papers
Sentiment :-     Dimension Fourth (I think)
Flowers and bling from stash

I am linking up to play along in the http://craftycardmakers.blogspot.co.uk/

Thanks for looking, have a great weekend
Happy Art Making
Hugs Lottie x

Wednesday, 3 February 2016

WOYWW #348

 
It's Wednesday and that means it's WOYWW  which stands for .......
'What's On Your Work desk Wednesday'.
If you too would like to join in the fun then, take a picture of your work desk, table, etc. and share it with lots of other like minded people.
Hop on over to Julia's blog   Stamping Ground  for more info. Hope to see you there.

 Hellow desk hoppers, 
It's been a while since I joined in with some desk hopping, so here I am today with my desk.
I am just in the process of making a card for the Crafty Cardmakers challenge so on my desk are various die's and punch, papers and flowers etc. At the back of my desk there is a new stencil from Docrafts some new, sale die's (not put away yet) my jar of Starburst Sours sweets (love these) a glasses case that I want to try and re-cover, a stack of embelishments and my January Tim tag along with the stamps I used.
Hope you have a great day and have fun desk hopping, t, I'm off to do some desk hopping myself so see you soon. 
Happy Art Making
Hugs Lottie x

Monday, 1 February 2016

Tim Holtz 12 Tags of 2016 January

Hello blog friends, 
Just making a quick post to share my 1st Tim tag of 2016.

I followed Tim's tutorial  Here
He says -
 "i’m going to be taking you back into the archives of my blog to explore techniques that might be new discoveries for some, and re-discoveries for others.  each month i will be “remixing” two previous 12 tags techniques to show you an entirely different outcome using the same techniques.  i plan to highlight new ideas i may have, perhaps show a new product that might exist now to achieve a similar effect, or just helpful hints i’ve learned since i originally shared the technique.  my goal is to empower your creative way of thinking and remind you that inspiration is right at your fingertips".

So, having spent a few happy hours in the archives with Tim, exploring his techniques, re-discovering the things he taut me and waiting with bated breath to be whisked away on a whirlwind of new discoveries I'm feeling empowered and inspired, my creative juice is flowing and with my fingers tingling in anticipation, here goes! 

I remember these two techniques from last year and in fact the Industrious Metal technique is one of my favourites,  though the Chalkboard Technique is one of my least favourite.

I used the gears from the Industrial Blueprint set of stamps for my image and  had to throw away my first attempt at the Chalkboard Technique before realizing my second attempt which wasn't much better could be covered by the decoupaged layer which was my third attempt and as it turned out was the best one,so as the saying goes 'third time lucky' was for me! 
For the top and bottom part of the tag  I used  a Cuttlebug  (Clockworks) embossing folder, and managed to complete the Industrial Technique without a hitch. 
The gear embellishment is cut from Tim's Gadget Gears die and put through the same Industrial process  (really happy with how that turned out). 
I didn't have any appropriate coloured ribbon so sprayed what I had with some DecoArt media carbon black mister along with a spritz of water and after drying I ran some brushed pewter Distress Stain over the top (love how that turned out too)  a gunmetal sort of grey with a subtle shimmery sparkle, just a pity it doesn't show that in the photo's. All that was left was to add a couple of metal gears and a word band. 
Eh Voila! my January 2016 tag is finished.
Ta Dah!

I thought I had done my best not to have the little smiley face in the middle of the cog but I see now I have uploaded the photos that he was determined he would. It is rather cute though dontcha think?
 
I am cutting it fine I know, that's one of my New Years resolutions out of the window already. 
All I can say is it's a good job Arizona is 7 hours behind us!!
Thank you for the ride Tim!
Hope you have a great week
Happy Art Making
Hugs Lottie x

 Edited
Can you believe it blogger decided to teach me a lesson by refusing to play nicely. I could not get it to publish my post last night, Sunday, until now 11.40 am  Monday so of course I have missed being able to link up at Mr Tim's.
I have heard these things happen but I've never had a problem until now.
So lesson learned I must not leave things till the last minute.
TTFN

Tuesday, 26 January 2016

Made but not Blogged !

Hello Blog friends,
I hope you are well and surviving the January blues?! 
January always seems to be a miserable month everything seems so drab once the Christmas decorations are down the presents are put away, people are back at work and wondering how long until the next holidays and the weather decides to give us everything except sunshine.
It's hard to feel motivated by anything! well almost anything as there is always crafting and the excuse to try out the new craft products that father Christmas so thoughtfully left under the Christmas tree. ( only if you were good of course)
So that is how this post came about. I received a new camera and took some practice pics and when I uploaded them to my computer I ended up sorting through all my uploaded pictures and found the following pictures of cards I made for friends but had not put them on my blog.
A lot of people show their favorite makes of the year, so I thought I would post these cards today.
WARNING! picture heavy but not much reading.
Anne of  http://bollyanne.blogspot.co.uk/   and   Darnell of http://www.djkardkreations.com/  you may well recognize some of these lol.


So there you have it, my first post of 2016 showcasing  cards from last year and even a couple from the year before that. 
And here are some of the pictures of the Barron family on Christmas Day

Jim, Rufus and Jasper, Jim is the one with least hair!
Number 1 Son Oliver
Favorite Daughter Katie
 Tree and Rudolf


Stella, Rufus and me
 Santa Stella-me-bobs
 Reggie
He's behind you!


 So now we have come full circle, I  think I need more practice with the camera or at the very least get my subjects to stay still lol.

I hope your January is going well so far 
Thank you for your visit today
Happy Art Making
Hugs Lottie x


Friday, 18 September 2015

A card for NBUS

Never-Before-Used-Schtuff (Stamps, Dies, EFs, etc.) 


Hello friends and a Happy Friday to you all.
I am whooshing (that's a Darnell-ism as if you didn't know) in today to link up my card with Darnell's of djkardkreations NBUS challenge. If by chance you are wondering who Darnell is and what does NBUS stand for let me explain.
 Darnell is one of the most entertaining bloggers (IMHO) in blog land, she runs a happy, entertaining, fun and witty blog with never a dull moment in sight, and as an added bonus she happily shares her amazing clean and simple style of card making art on an almost daily basis. Add to that the regular photographs she posts of the wonders she sees from her Playhouse and the tall tales she tells of her sidekick and muse, Hammy, who resides there, well aren't you just dying to go check her out ?!
 
But wait ! I haven't told you about NBUS. 
This is an acronym coined by Darnell and stands for Never-Before-Used-Schtuff and the challenge is to encourage us to use our NBUS from the back of the cupboard - bottom of the draw - top of the wardrobe - under the bed stash and create something with it.
If you want to go check out Darnell and the NBUS challenge click  HERE 
This challenge is massively supported by her many friends (followers) and this time for challenge number 5 has many well known sponsors who are generously donating prizes too. 
 
The Card
This is my first attempt at using Brusho powder inks and I would  like to thank Eileen Godwin of Eileen's Crafty Zone   for the inspiration to try these powdered inks. Her art work is amazing.


I used :-
Penny Black - Floral Display stencil  (NBUS)
Brusho - Lime Green and Lemon    (NBUS)
Clearley Besotted - Sentiment
 
I wish I had used a plain white card stock for this card front  instead of  pearlescent.  I don't like the gold sheen of the card with the Brusho colours, also the black ink didn't cover very well on this card, I had to try several different black inks'  and it didn't photograph very well either.
I have a lot to learn, ah well, I know for next time eh !

Congratulations Darnell on your 5th NBUS challenge and the great response it's achieved.
Hey you've even managed to drag me out of the doldrums and make a card. lol
 
Thanks for stopping by, have a happy weekend  and
Happy Art Making 
Hugs Lottie x 

Monday, 1 June 2015

Tim Holtz 12 Tags of 2015 May

Hello fellow bloggers, well here I am with my May tag for Tim Holtz 12 tags of 2015 and as usual I am scraping in at the last minute. So I had better not waffle on too long or I will miss the bus.
So here it is 
Ta-daaa

I followed Tim's great tutorial but used some alternative elements as I did not have all of the items he used.
My tag is a tribute to a significant chapter in my mum's life and indeed mine.

The picture I've used is a photo of my mum aged about 20. The year was 1953 and she was about to travel to South Africa to marry the man who had written to her and asked her to marry him, my dad. 
They were going out with each other when my dad's work took him to South Africa and I guess it was a case of "absence makes the heart grow fonder."

The picture of the ship is an actual poster that I managed to find via the internet of the ship Sterling Castle that my mum traveled on. The All Aboard card is a docrafts Urban stamp as is the ticket at the bottom. I used the same quote as Tim because it does describe my mum, she was kind hearted.
The trinkets I used belonged to my mum the little flower  came from a pair of large clip on earrings that I can remember from when I was a little girl, and then found, still in her jewelry box after she died. The little bell is also one of a pair of earrings which my mum really liked and wore often.
I used  the word love from  Tim's special delivery remnant rubs on the token, the tattered garland die for two of my flowers and the Gothic stencil for the pink decoration.

I think my mum was very brave to travel by ship on her own to South Africa at twenty, I really don't think I would have dared when I was that age. But not only that, she also made the return trip back to England on her own with two small children. I was born in 1955 then my brother in 1958. In 1959 they decided that my mum my brother and I would return to England as I would be starting school the following year,  My dad stayed there to work another few years before coming back to join us in England. 


So thank you Tim for the inspiration to make this tag personal to me, and thank you mum for being my inspiration, love and miss you    

Thank you for stopping by
Happy Art making 
Hugs Lottie x

Tuesday, 31 March 2015

I'm Using My NUBUS

Hello to you on this wet, windy and snowy Wednesday here in Halifax. Hope you are faring better with the weather wherever you are.


I am blogging a Card I have made to join in with Darnell's  NBUS challenge # 4. 
NBUS is an acronym that Darnell christened and stands for Never Before Used Schtuff  and the challenge is to encourage us to use some of our  stash that has never seen the light of day since being purchased to create something. So if you would like to play along click on this link djkardkreations to find out her Require-Mints, but you will have to be quick as it ends at 11.55 PST, March 31, 2015. Which of course is TODAY !!!   I'm not called Last Minute Lottie ! for nothing you know.
So here is my card


I made this card in memory of my mum.

I used Picked Raspberry and Seedless Preserve DI to colour the masked panel then went over with a
Dutch Doobadoo  chicken wire stencil. I then stamped using Archival black ink and a Inkylicious Water Rain Drops stamp then lifted some of the colour out of the droplets and added highlights with a white Signo pen.
For the embellishment I stamped a Butterfly from the A Muse Studio Pappilon  stamps in Versamark and embossed in gold, then coloured with Distress Markers. The sentiment came with a magazine.
I like how realistic those water droplets look and the pretty Butterfly embellishment, though I would prefer the stenciling to be a little lighter next time.
So my NBUS are :-
Dutch Doobadoo  Chicken Wire stencil
Inkylicious Water Rain Drops stamp
A Muse Studio Pappilon  stamp set
Magazine freebie sentiment stamp
So happy to have been able to play along in Darnell's NBUS challenge # 4.

See you soon and thanks for dropping by

Happy Art making
Hugs Lottie x 


Monday, 9 February 2015

Tim Holtz 12 Tags 2015 February

 Well, for once I am I am not "last minute Lottie" as I have managed to make and actually post my finished tag at the beginning of the month instead of at the end or even not at all!!
I followed Tim's detailed tutorial which you can check out  here but used Madam Payraud's 8x8 paper stack for my collaged background, love these papers. I also used a piece of  Docrafts adhesive fabric 'Sew Lovely' Tape Measure paper roll which has got lost under the frame and heart. I stamped the word Love on a ticket from the ticket strip die as I didn't have any of the Holiday Flash Cards and also added a strip of Sketchbook tissue tape.


I made my felt heart by first sticking felt to some card and die cut using the M+S heart die, then die cut another felt heart without the card backing, and also cut another heart from some light weight wadding. I trimmed down the heart wadding a little and used a small amount of  glue to stick it to the felted card then made a sandwich, card/felt, wadding, felt heart. I then sewed round the whole thing on my sewing machine which was a bit fiddly and not as evenly stitched as I would have liked, but I could almost hear Tim in my head saying "embrace the imperfections"  so I did ! lol 
I decided to add some seed beads for texture and to give a quilted look which also doesn't show up very well in the photo's.


To finish off I added one of the corners from the industrious stickers, a couple of heart brads slightly inked with a litlle Black soot DI to the word band (it is a Valentine tag after all) a snippet of lace to the bottom and  some crinkle ribbon to the top, coloured with a Marvy Brush Marker which matched the colour of my felt heart perfectly.


I enjoyed making Tim's February Tag and am happy with how it turned out though I think I might add more of the Black Soot DI next time to give better shadows around the collaged pieces. I panicked and smudged more off than I left (Tim didn't offer up any encouragement during that part) lol. So I'm off to link up over at Mr H's place and take a look at some of the great tags and leave a little love.
Thanks for stopping by have a great week
Happy Art Making
Hugs Lottie x


Wednesday, 4 February 2015

WOYWW #296

It's Wednesday and that means it's WOYWW  which stands for .......
'What's On Your Work desk Wednesday'.
If you too would like to join in the fun then, take a picture of your work desk, table, etc. and share it with lots of other like minded people.
Hop on over to Julia's blog   Stamping Ground  for more info. Hope to see you there

Hello fellow desk hoppers, hope you are well and keeping as warm as you can on these wintery days. Here in West Yorkshire we have had some sun today (which always gives you a lift) though it is very cold.  Anyway down to business.

The Desk
Or to be more precise the new area for my finished DI storage units and shelving at the end of my desk (thank you Jim) Perfectly sized or so I thought until Mr TH announced 12 new DI colours to be released over the next 12 months. Hmmm maybe with a slight modification.................
 "Jim! have you got a minute"? 
 I don't know why but those six little words seem to cause a glazed look and a nervous tick to affect Mr B within a nano second of me uttering them.
The only problem was the sun hits my desk at this end so I needed a front to stop the inks drying up.
"Jim! have you got a minute"
Voila
It is held in place with magnetic tape and works well, I just remove the front when I use the Inks.
All I need to do now is decide on how to decorate it.

After faffing round deciding what to put on my little shelves Rufus decided to make use of the newly de cluttered desk space and claim it as his own, cheeky boy. 
Hope you have a happy desk hopping Wednesday and thank you for stopping by.
Oh! wait a minute I just realized when looking at this last pic that I need a front for the other side, what can I say I neeeed symmetry in my life.................... 
"Jim!  have you got a minute"
Happy Art Making
Hugs Lottie x

Monday, 6 October 2014

NEW ! - Zsuzsa's Sunday Sentiments

Hello fellow bloggers,
Today is the start of Zsuzsa's new weekly link party,  Sunday Sentiments. Everyone is welcome and the rules are very simple: post a link to your crafty project that includes a meaningful sentiment. 
If you would like to know more and would like to join in click on this link > Introducing Sunday Sentiments to be taken to her information page.

Zsuzsa has created a beautiful vibrant canvas with of course an appropriately lovely sentiment.  
Click on this link to take a look  >  Inky Dinky Doodle

So, for my offering I am linking this 60th Birthday card that I made for a male friend as it has the required meaningful sentiment (I hope). My card base was coloured with Denim and Vintage Photo DI, then embossed with the Pocket Watches embossing folder. I used the movers and shapers mini pocket watch die to cut some foil covered grunge board which I then embossed with the Gears folder. I  used Tim's industrial technique to finish it off. I also used this technique on the numbers 6 and 0.
The sentiment I created on the computer and printed on to some Vintage Photo Distress inked manilla card stock and placed behind a  black card, pocket watch die cut. To finish off I added some idea-ology gears and a piece of chain.


I hope you will join in with Zsuzsa's new Sunday Sentiment link party, she even allows you to link to a previous project you have made, which is excellent, as I think most of us have probably said "sometimes there just aren't enough hours in the day"!
Thank you for stopping by 
Happy Art making
Hugs Lottie x

Wednesday, 1 October 2014

WOYWW # 278

It's Wednesday and that means it's WOYWW  which stands for .......
'What's On Your Work desk Wednesday'.
If you too would like to join in the fun then, take a picture of your work desk, table, etc. and share it with lots of other like minded people.
Hop on over to Julia's blog   Stamping Ground  for more info. Hope to see you there
Hi WOYWWers,
It's been a while since I last played along so I thought I had better get my act together and join in with some desk hopping. 
First though I must apologize for the rubbish quality of the photo  today, as I took my camera out of it's case I managed to alter "something" ??!  Every photo was terribly out of focus so I messed about trying to put things right, but seeing as I hadn't a clue what setting it had been on (did I mention I am technically challenged) I was stumped! This pic was the best I could do, so I'm afraid it is  WYSIWYG ................... What-You-See-Is-What-You-Get, which is pronounced wiz-ee-wig in case you were wondering lol


 I am in the middle of making a 60th Birthday card for my friend Joe and have just added the piece of chain hence all the bits of jewelry. The little jam jars house various sizes of split rings, the tall container holds brads, the tube at the back is a file set. The skeleton languishing on my phone is to remind me Halloween is just around the corner and the two Christmas cards are to remind me Christmas is just a little bit further round the corner........... only kidding (though these days I seem to have to make a heck of a lot of "reminder" and "to do" lists) 
The Christmas cards are from Darnell's  NBUS (Never Before Used Schtuff) challenge, from last week, she had hit the 600 follower mark and to celebrate decided to have her second NBUS challenge which had an amazing 300 entries, Way to go Darnell!!
 
So my desk hopping friends, that's about it. I must away back to my Birthday card as I need to make a suitable insert and cut a card base to finish off, then I'm off to the post office with it. 
See you at your place later
Happy Art Making
Hugs Lottie x

Thursday, 25 September 2014

NBUS (never-before-used schtuff) Challenge - Anything goes

Never-Before-Used-Schtuff (Stamps, Dies, EFs, etc.) 

http://www.djkardkreations.com/p/nbus-rules.html

Hello to you, I hope all is well with you and yours on this rather cool and dull day ( well it is here  in Yorkshire) you can definitely tell Autumn is fast approaching. Don't get me wrong I love this season it's just that you know that winter will soon be following eek!

Any way I am here with two cards to link up with Darnells NBUS ( Never Before Used Schtuff ) challenge. I am very late entering but if you would like to take a look for yourself you can follow the link above. 

I have chosen option  #3 Make two Christmas cards using the same stamp


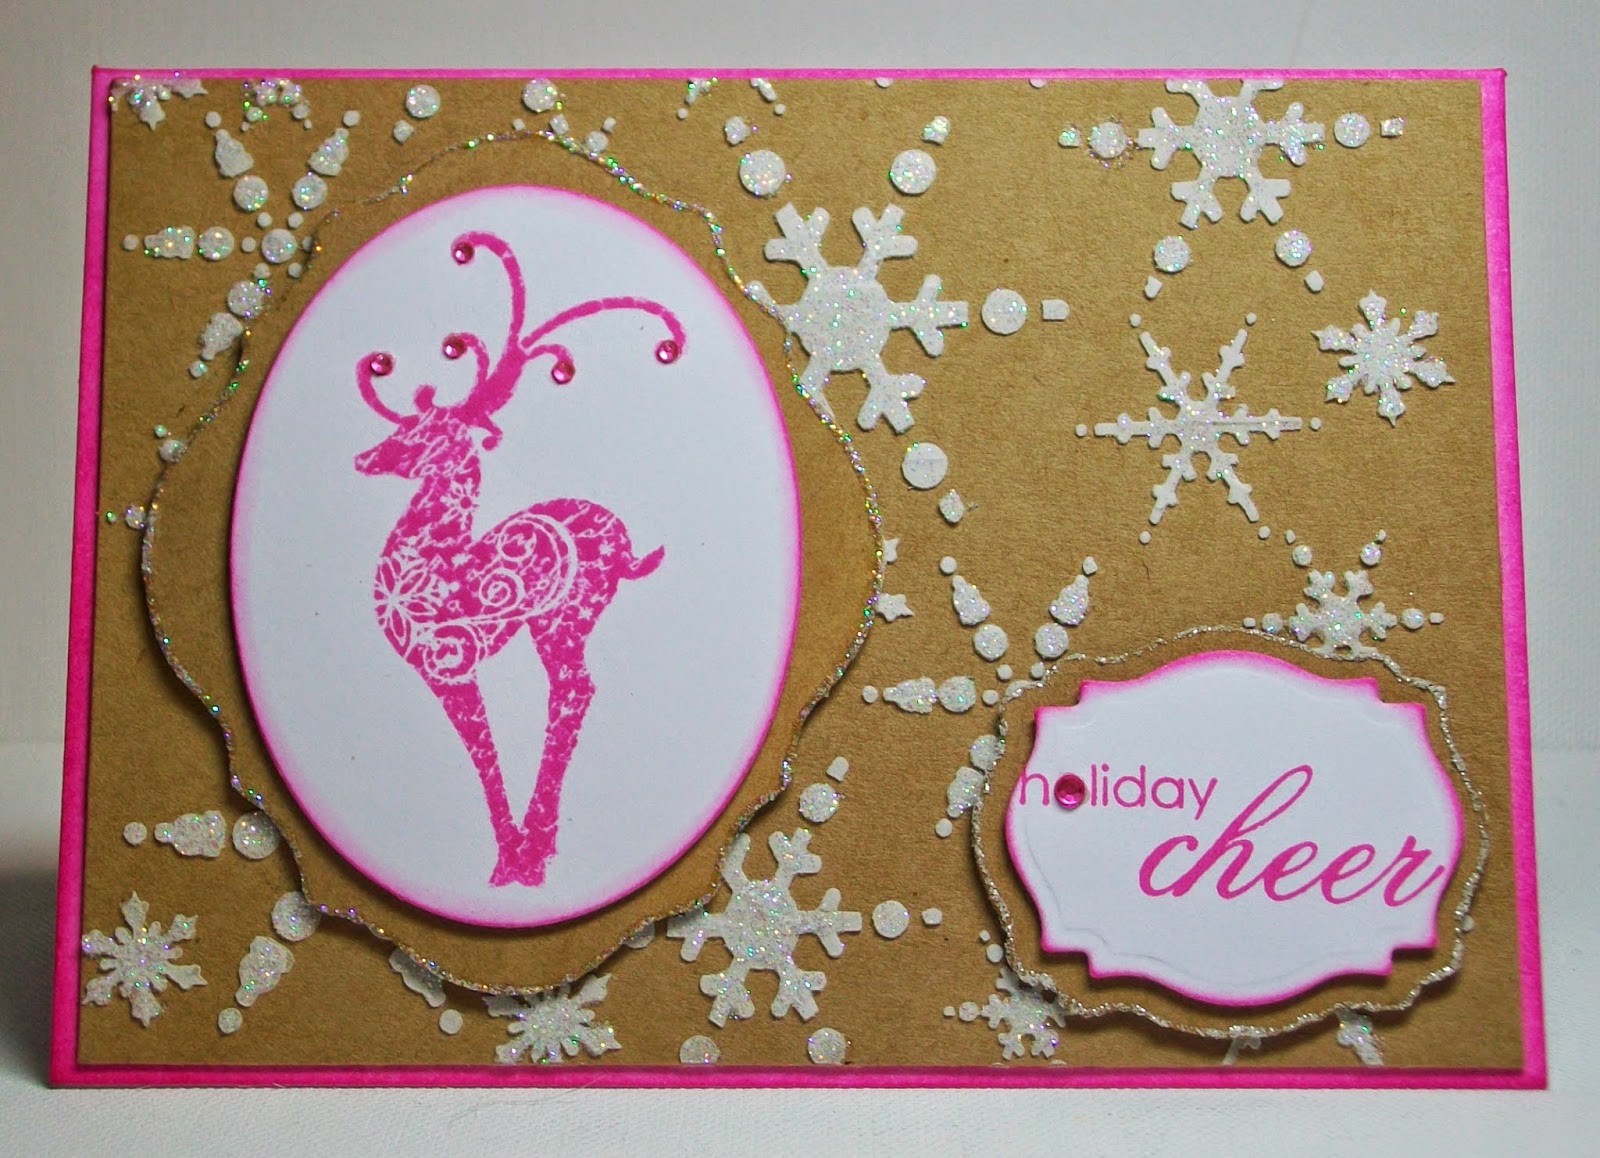
 On card  #1  the Reindeer is from a set of Christmas  stamps that came with a magazine (NBUS) I used Imagination crafts snowflake stencil (NBUS) for the background with Texture paste and glitter, the larger die cut topper is cut from Sizzix Labels also NBUS, the smaller one I used is Spellbinder labels 18 .


On card  #2  I used the snowflake from the above mentioned stamps to create a background and Spellbinder Nested Hearts (NBUS) to cut a vellum topper for the Reindeer, I also used the embossing paste through the pattern of the die to create the pretty filigree border. as you can probably see I managed to smudge some ink from the Reindeer, I wont tell you what I said !! my black Stazon had dried up so I had to use my Versafine pad and the ink just would not dry. The sentiment is also (NBUS) from Stamptivity which is no longer trading.  

So that's about it, I enjoyed making these two Christmas cards, and maybe this will be the incentive for me to carry on and make some more (don't hold your breath) lol. 

Thank you for stopping by, hope you have a great weekend

Happy Art making

Hugs Lottie x


Friday, 1 August 2014

Tim Holtz 12 Tags of 2014 July

Hello friends,
Well I could almost cut and copy the first sentence from my June tag post, as I am so 'last minute Lottie again' !! I shall blame our hot sticky weather for sapping all my energy, also a family funeral to attend, but on a happier note an enjoyable day out to Lincoln with Katie for a workshop making  a mini storage box designed by Anne go  here   if you would like to see what it looks like. 
I still have quite a bit to do before I finish mine, so watch this space.  
Sorry I didn't get to meet you Anne, hope there might be a next time x
Any way something I have managed to finish just in the nick of time is my July tag, 

And here it is.


I have a thing for seahorses so this tag was a delight to make I followed t!ms tutorial here  
His tutorials are excellent, very easy to follow and with the added bonus of step by step photo's.
 My tag is more or less the same as t!m's I just added some seedless preserves DI to my sea horse and seaweed. I didn't have the linen ribbon so I used a net bag from a bag of onions, the bag was orange so I coloured it with my Promarkers which gave a key to the plastic so  I could then use the same distress paint colours as the background of my tag. I am quite pleased with the effect.
I just had one problem and that was with the distress crackle paint which did crack beautifully but unfortunately fell off in places when I inked it with the pumice stone stain. I think maybe I applied too thick a coat or possibly the D paint wasn't quite dry when I applied it. I reapplied a thinner coat in the places it had fallen off and it was ok but it didn,t crack as much.
 
 
Overall I am happy with my little sea horse and the clever way t!m showed us how to "create" sand, I wonder what he will come up with next? Only a few more hours and I will find out lol
Wishing you a great weekend
Happy Art making
Hugs Lottie x